How To Make Lefse

DSC_0365

The Recipe First

Greetings! This post is very overdue. In 2019 I got really ambitious and sold my homemade lefse in my very Norwegian hometown. I made gobs of lefse and gobs of money. I made some family members swoon with pleasure at the gifts I gave. It was fun, and I think it is safe to say, I perfected my method.

Lefse is a tortilla type of flatbread made out of potatoes, lard, and flour. My grandmother Anna, was born in Norway in the 1880’s and I like to think she brought this recipe with her. Her daughter, my aunt Cora gave me the recipe and method a hundred years after my Grandma was born, in the 1980’s. Cora was born in 1917, and she passed away in 2001. I didn’t start making lefse regularly until she was almost gone. I brought some to her in the nursing home. I was mighty proud of it!

This is my beautiful Aunt Cora when she was young. She had pretty red hair.

There are many different recipes and methods for making lefse and if you have an aunt or grandma that insists theirs is the best, don’t argue with them. Use their way. I am all for tradition. If you don’t know where to start, I’ll help you out.

For those of you who already know the difficult steps for making lefse, I will put the recipe up first, so you don’t have to slog through what is going to be a rather wordy post.

Heritage Lefse

3 cups mashed potatoes

1/2 cup melted lard

1 tablespoon sugar

1 1/2 cup sifted flour

1/2 teaspoon baking powder

1 teaspoon salt

If you know what to do next, copy down these simple ingredients and heat up your lefse iron.

If it looks so easy you think you can just go, well, I’ll see you later when you have a sticky mess.

If you want the authentic method my beloved auntie taught me, whose mother from Norway taught her, well then, fasten your seatbelts and hang on.

The Potatoes

My husband Martin and I just love potatoes. Any form will do! If I go for a week without a potato, especially a baked one with sour cream and butter, I feel so deprived. If we run out of potatoes, it is a serious crisis! (It would be like running out of coffee God forbid.) Is it any wonder we are so crazy about lefse.

When Cora was teaching me how to make lefse, I asked her about the potatoes. She only shrugged and said, “Use leftover mashed potatoes.”

First of all, in my house, leftover mashed potatoes would be like leftover wine. Leftover? Really?  Certainly not three cups leftover.

Next, Martin and I have perfected the lovely rustic lumpy mashed potato with the masher. We like to add garlic, caramelized onions, sour cream and butter. Sometimes, if Martin wins the battle, they will be mashed with the skins on. Kosher salt and freshly ground pepper round it out. If we were to use leftover mashers like this, the lefse would be very different. Especially with the potato skins included. If you try it, let me know. I’m a bit of a snobby purist and like my way better.

My dear mother tried to make lefse in the 60’s. She struggled for a time, but then figured it out. Her mistake? Those 60’s moms just loved anything that made life easier, like food in cans and boxes. She tried to use instant potatoes.

I went to a craft show recently where lefse was being sold. The list of ingredients was alarmingly long, with stuff I couldn’t pronounce, but the first thing on the list was dehydrated potatoes. Perhaps instant potatoes have improved in the last fifty years. Still, I am a very old fashioned cook, and I like things old school, and the food as real as you can get it. So from scratch mashed potatoes are it!

fullsizeoutput_3836
DSC_0417
DSC_0418

You do not want to use the nice potato masher if you are going to make lefse. The lumps that are in the potatoes do not incorporate the lard and flour very well, and then your lefse has potato lumps in it. I think they are tasty, but it does stick while trying to roll it out, and it is just not a good quality lefse.

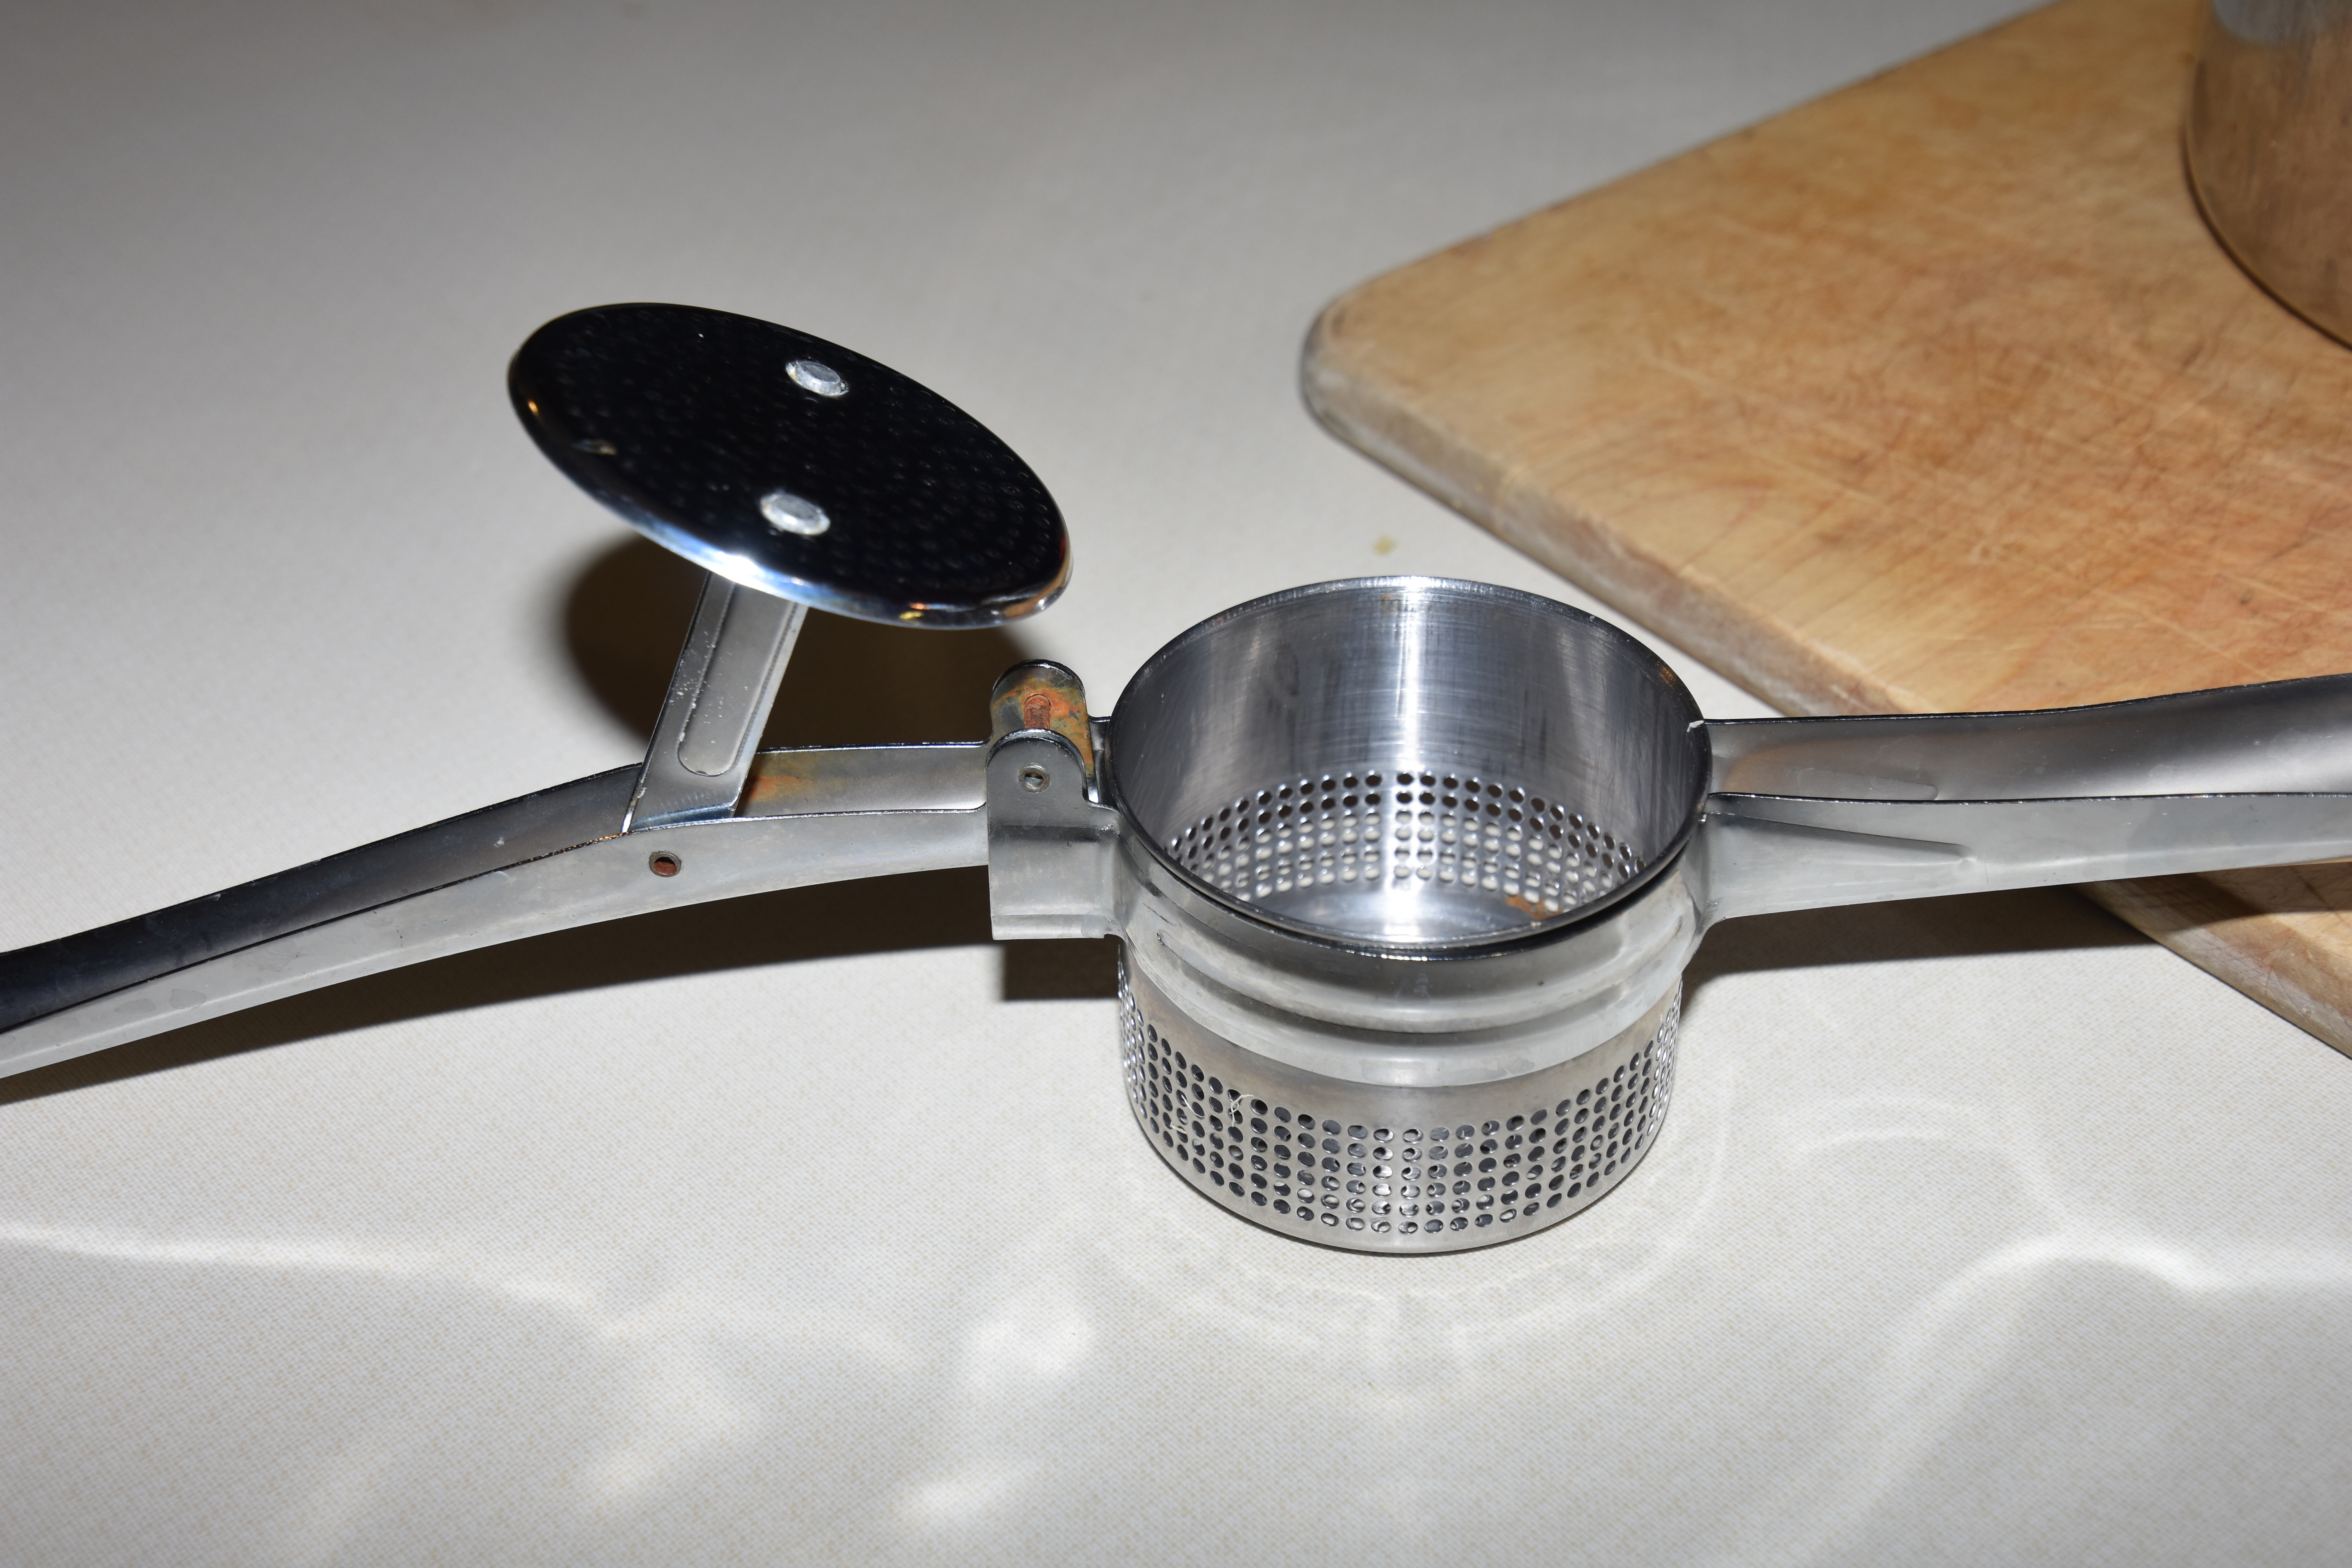
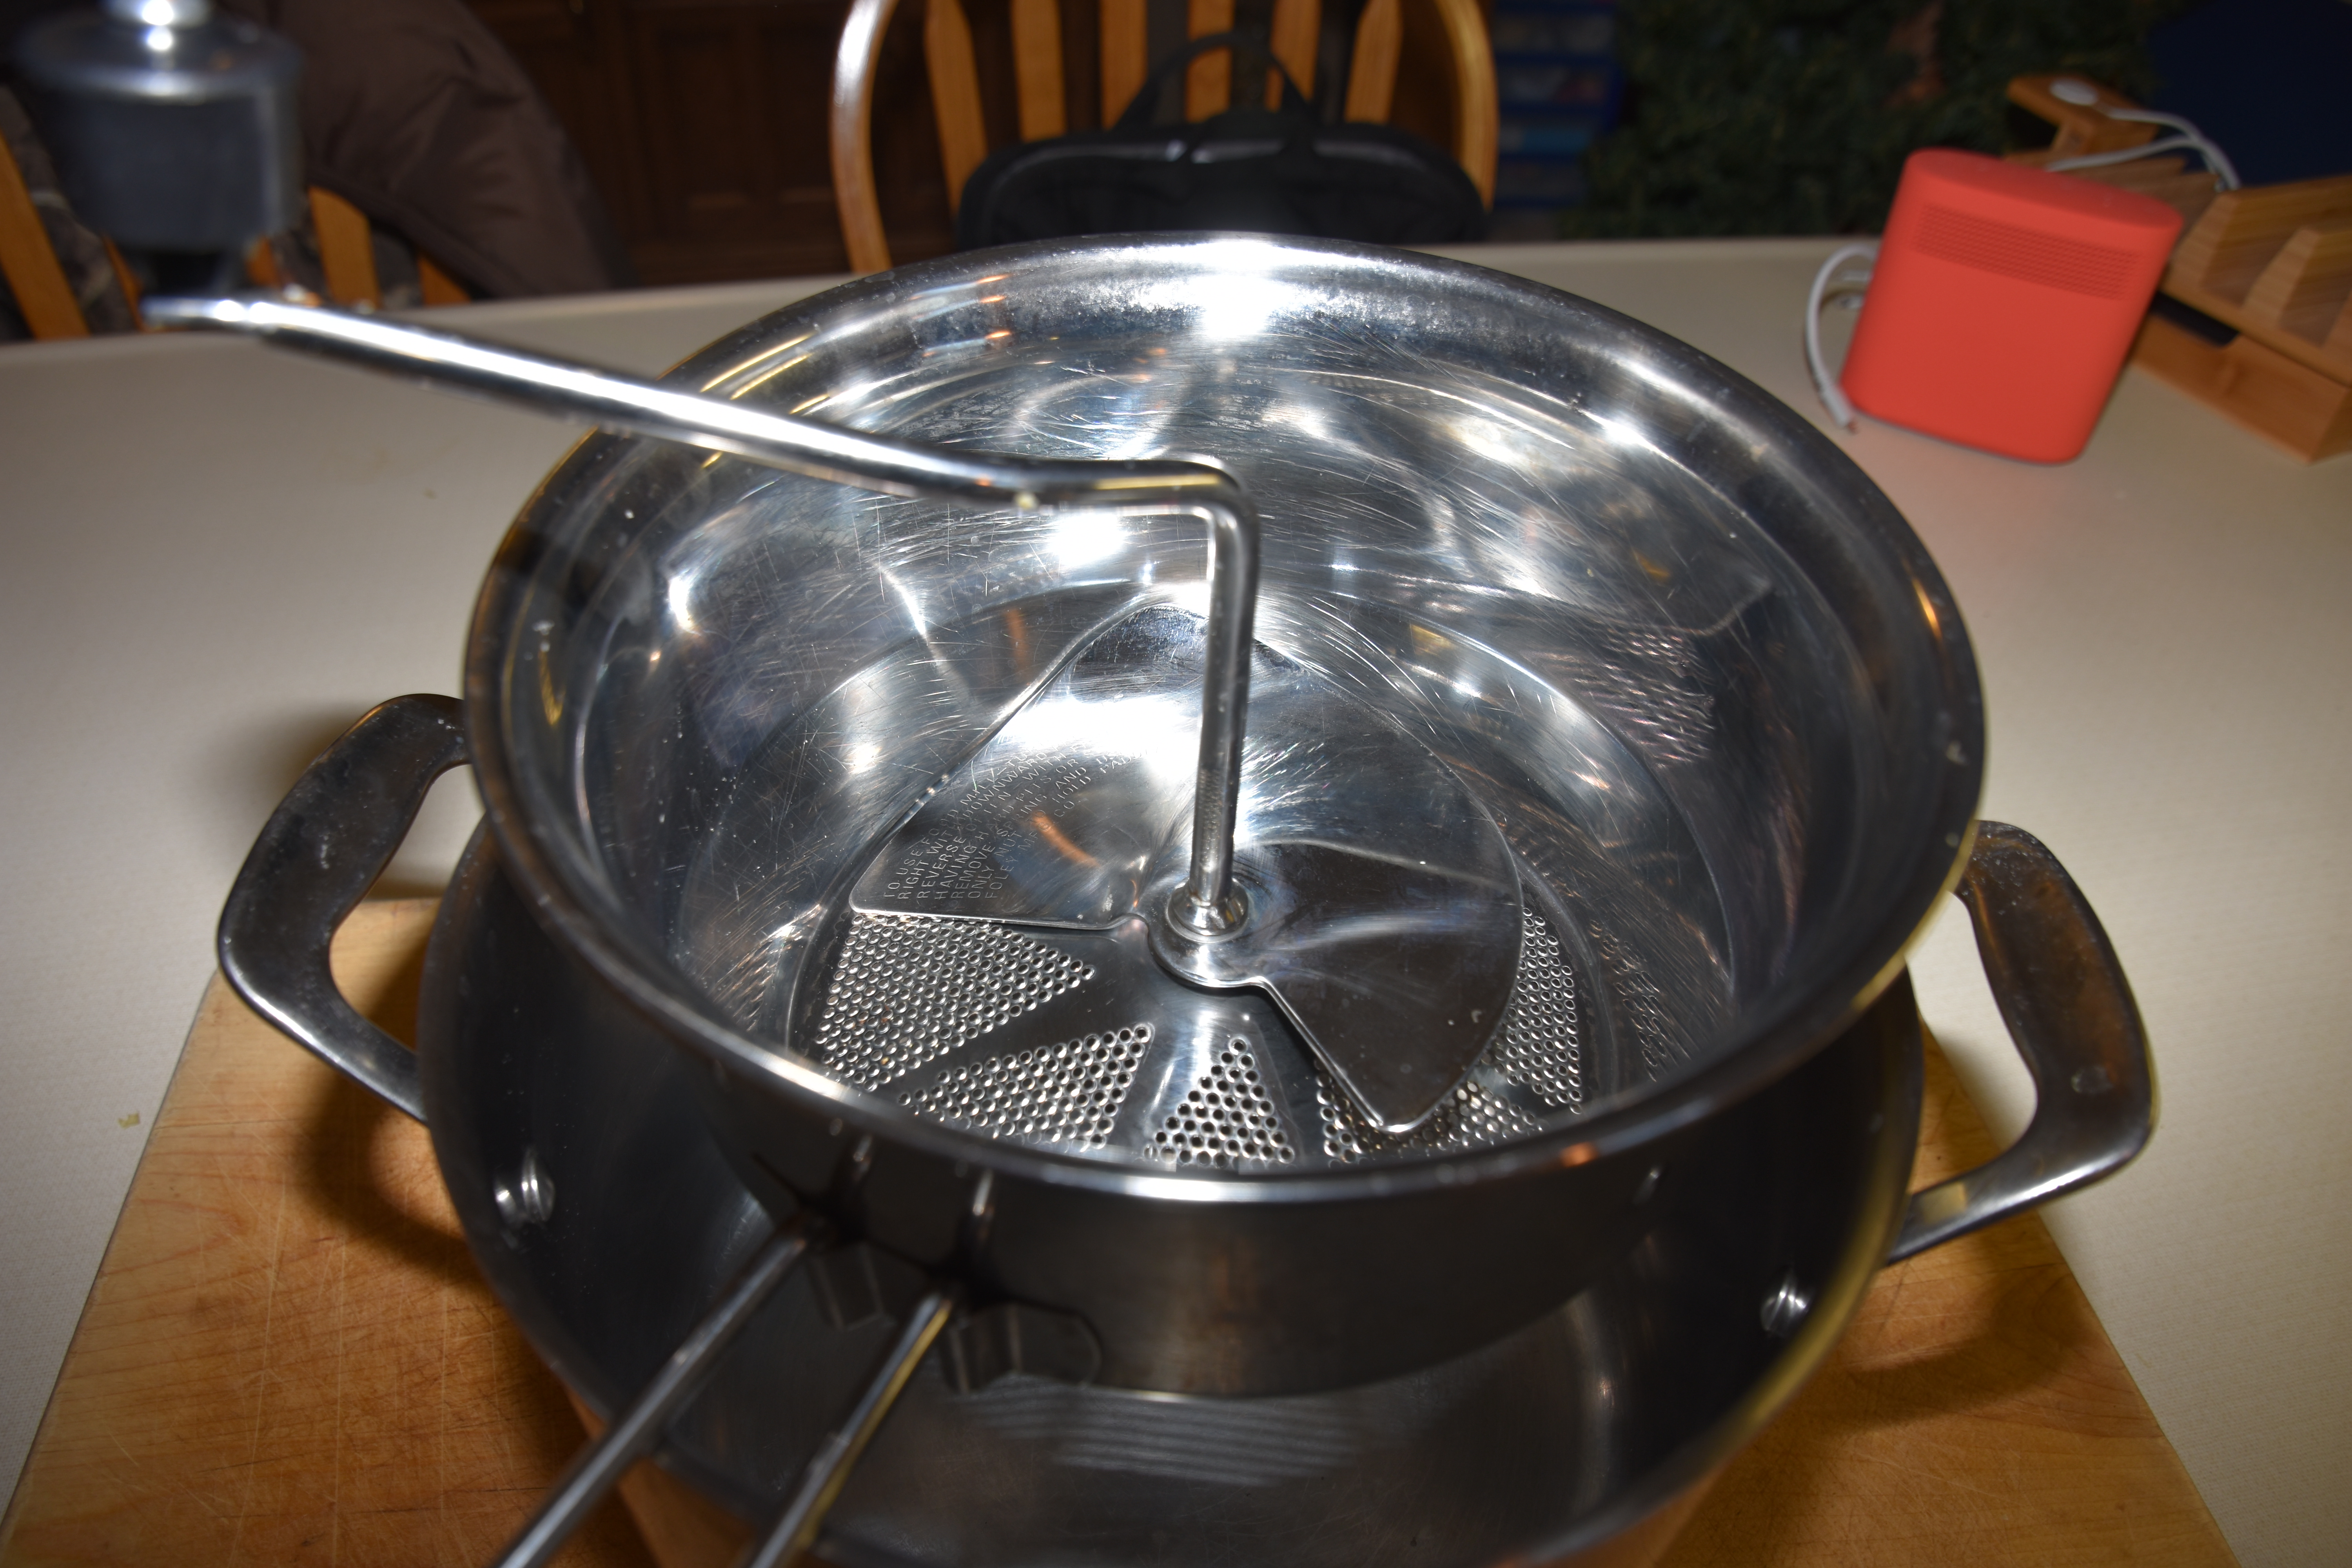
The potato ricer, and the food mill are the best way to treat your cooked potatoes if you are going to make lefse. In fact, I think all mashed potatoes should be this way. They might hold more gravy……

That year for my mass produced lefse, for the very first time, I actually used a recipe to make mashed potatoes.

MASHERS FOR LEFSE

                           2 pounds of russet potatoes

8 Tablespoons of unsalted butter, melted

1 Cup half and half, warmed

1 1/2 teaspoon salt

White pepper

Place the scrubbed potatoes in a large saucepan with cold water to cover by one inch. Cover, and bring to a boil over high heat. Reduce the heat to medium low and simmer until the potatoes are tender when pierced with a fork or thin knife. This will take 30 to 40 minutes depending on the size of the potatoes. Drain into a colander.

Set the food mill over the now empty hot kettle. Spear a potato with a dinner fork and peel back the skin with a paring knife. Repeat with the remaining potatoes. Working in batches, cut the peeled potatoes into chunks and drop into the hopper of the food mill. Process the potatoes into the hot pan.

Stir the melted butter into the potatoes with a wooden spoon until incorporated. Gently whisk in the half and half. Salt and pepper to taste.

My fingers are burning just looking at this picture. It’s tempting to think, what a pain in the ass, isn’t it? Every so often I want to say to hell with it, and just peel, and chunk them then boil them already. I’ve done it that way many times. But every brown spot left shows up like an ugly pimple. This method actually helps not getting those spots. There is more flavor in the potatoes this way, because the skin holds the flavor in. Come on, tough it out. This is worth it.

I think thick skinned russets have the best flavor and texture and are the easiest to peel. You can use a different potato, but the lefse will be different. Hmmmm. Someday I might try a yellow potato.

I bent my dainty ricer trying to process my potatoes. so the food mill works much better for me. I love the smooth texture that comes out. If you have a lump in your mashed potatoes, your lefse will have a lump. There’s no lumps with this gadget.

Melt that unsalted butter. Now why did I include a picture of melted butter in a pan? Oh, I have unhappy experiences to share of butter melting. What? This supposed expert cook had issues melting butter?

Oh yes. Issues. Melting butter.

I took a stick of cold unsalted butter and put it into a glass measuring cup and threw it into the microwave. On high. For….a while. I heard a loud pop and looked in the microwave to see a partially melted stick of butter, and the rest of it all over the microwave. I no longer had a measured amount, and a mess to boot.

I started over on the stove in a pan. I’m in a hurry now, so high heat because that will do it faster, right? BOOM! Same thing. The butter exploded all over the stove.

Why does unsalted butter explode? I have no idea–I’m a grandma not a chemist. So now, I melt the butter on low, and I don’t leave it to go do something else. My poor sister-in-law turned on the wrong burner on my stove one hectic holiday and exploded the butter. It was exciting.

Add the melted butter, and only the melted butter to the hopefully still warm potatoes. They will soak it in like a really thirsty potted plant. You shouldn’t see butter any more before the next step.

Add the half and half all at once. Doesn’t this look like a glorious mess? I did this step one Thanksgiving with a relative watching and she was certain it was now ruined. But magic happened. The recipe says use a whisk but I do just fine with a spoon or spatula.

Stay patient. Patient! After a shorter time than you think, it starts looking just like this. All that yummy half and half is now soaked up and you have perfect creamy mashed potatoes.

Now you need to add salt and pepper. I like to use finely ground white pepper because then it won’t show up in the lefse. Freshly ground is great, but it has to be very fine. I have used freshly ground black pepper and picked large pieces out of my lefse. Not the end of the world, but if you are making these for gifts someone might say something like what the hell is this anyway?

Taste the potatoes. They have to taste so good you want to suck out the whole works with a straw. Don’t skimp on the salt and pepper. I do measure the salt out per the recipe, but I do guess on the pepper. If they taste bland, add more pepper.

Measure out three cups. You might want to chill it down, so all those ingredients make really good friends with each other. Keep in mind, those thrifty Norwegian ladies used leftover potatoes to make lefse with. You probably could use them right away, but now you are tired. Rest a little. If you made extra, eat them for supper.

The Lefse

The next day, or the day after that at the most, you can now make lefse. Three day old (or more) mashed potatoes take on a funk and don’t use them. They might be a little watery, but that’s ok. Stir them up. Let them come a little to room temperature, about a half hour or so. In the meantime, collect your ingredients and equipment.

You will need a sifter, a pastry cloth, a special ribbed rolling pin, or a special stocking to put over your rolling pin, and a lefse iron.

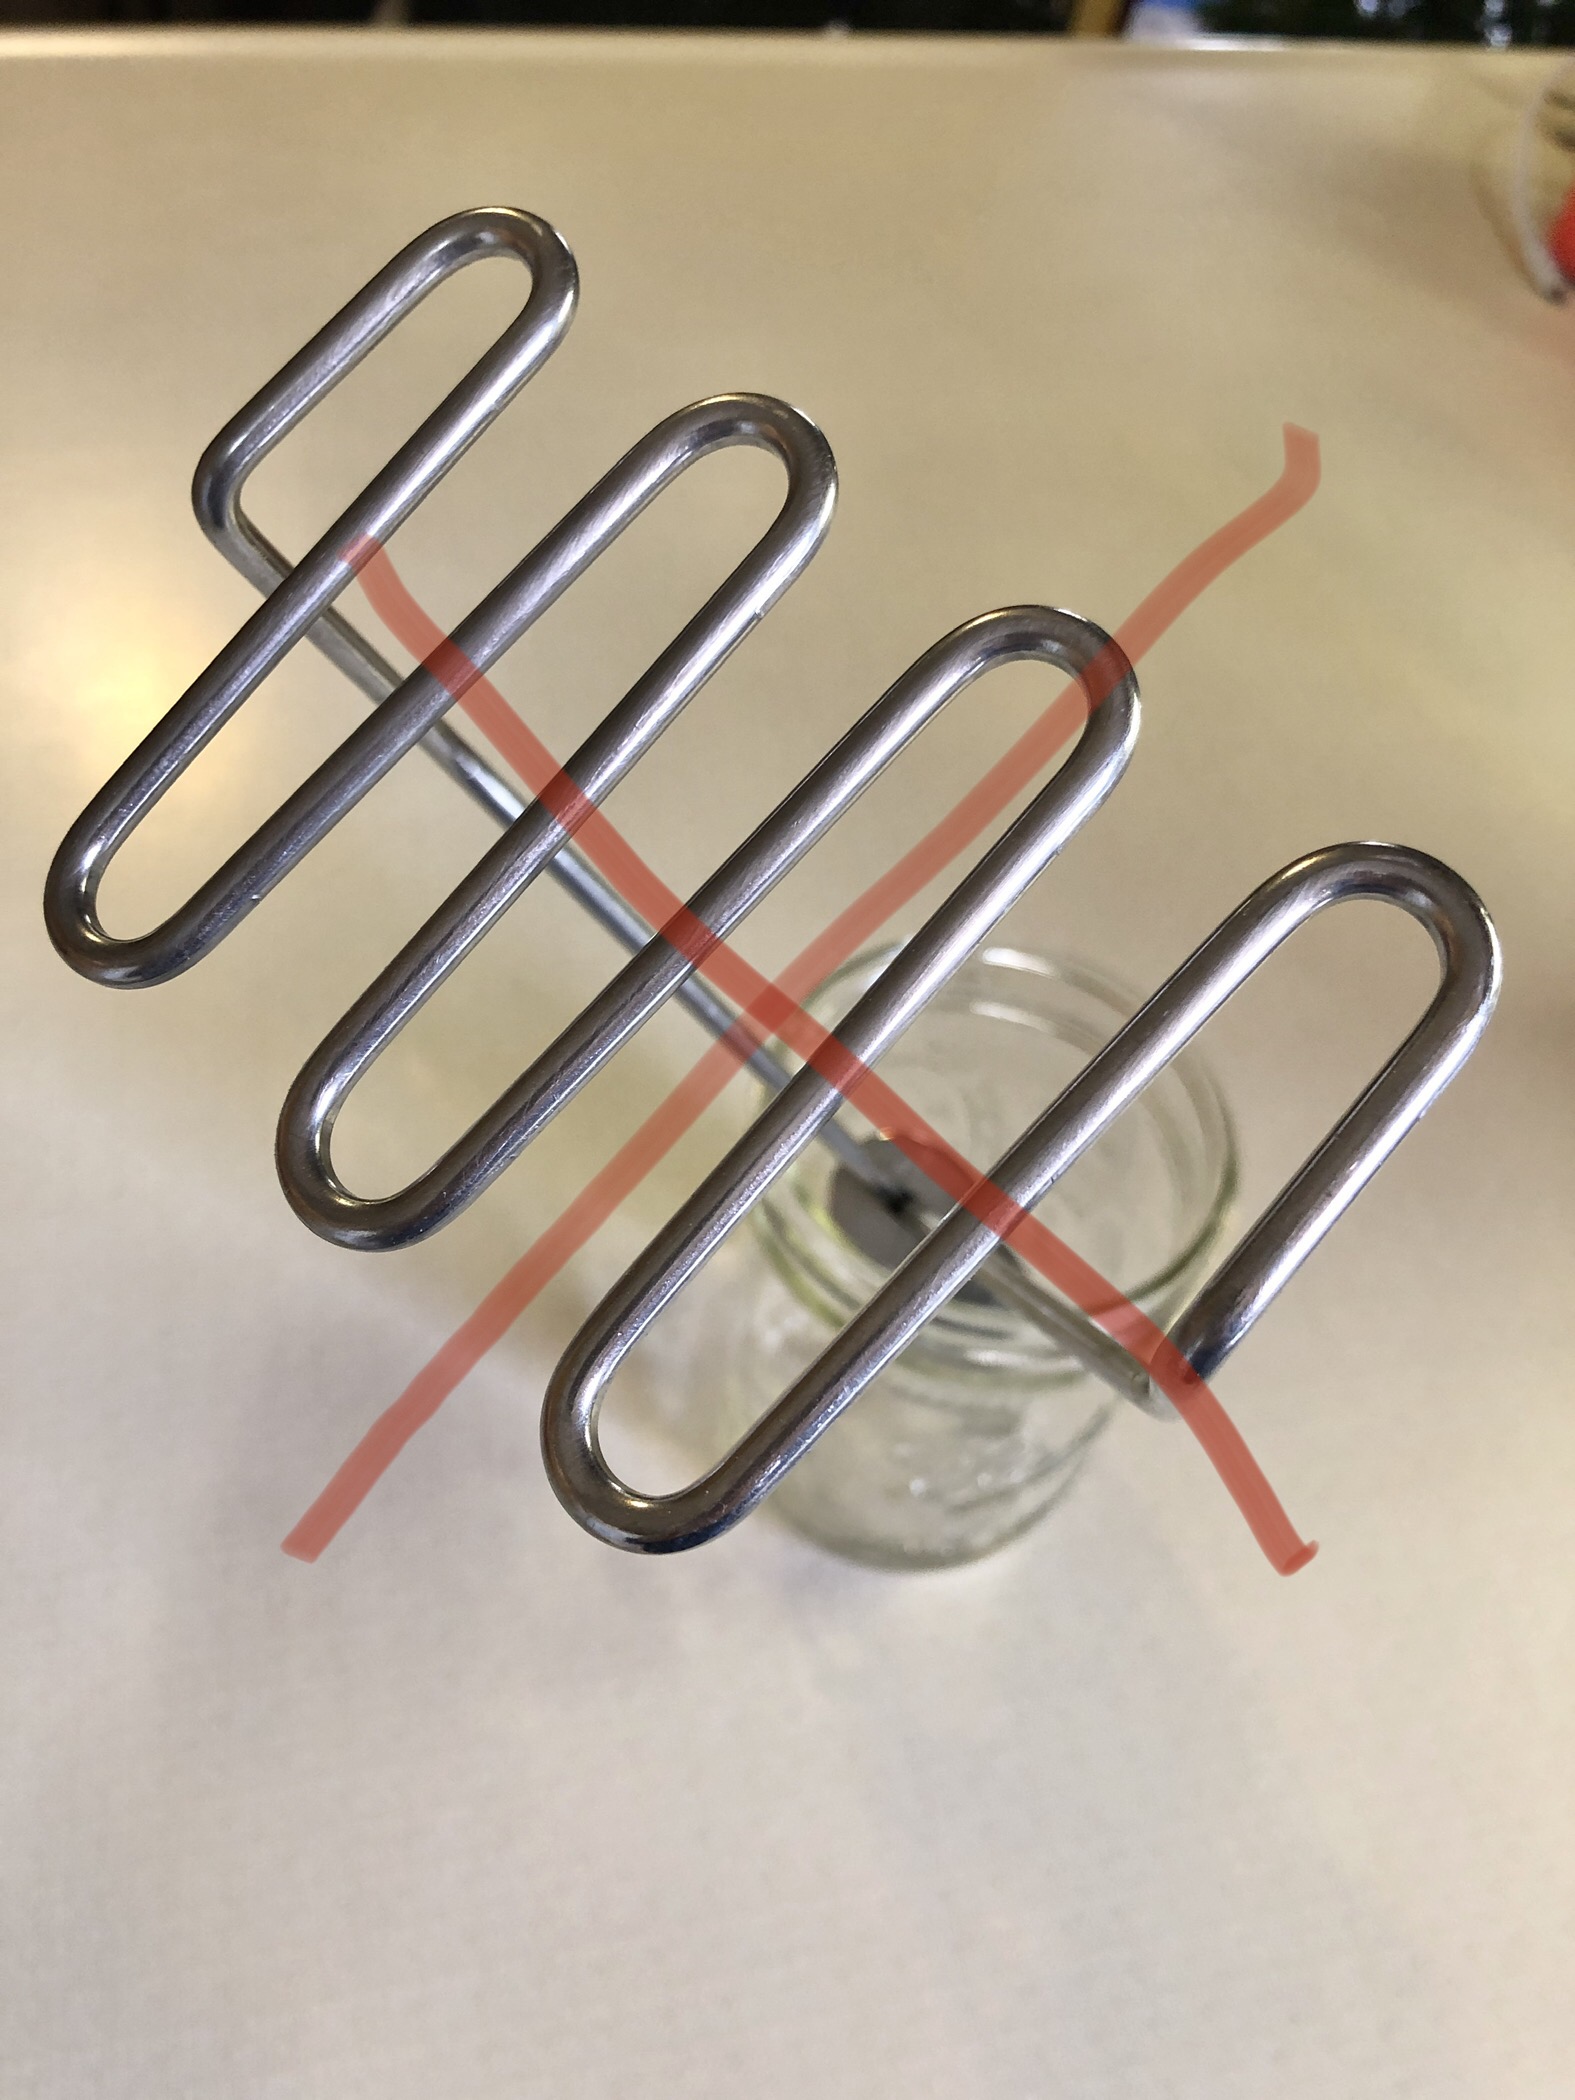
Most irons come with lefse sticks, which are used to turn the lefse. Mom, with her instant potatoes, struggled with the too thick sticks, and Dad took an old yardstick and sanded it down. It is one of my greatest treasures. The stick that comes with your lefse iron is just fine, I’m sure. If you find it cumbersome, get the sandpaper out, and make it thinner.

This sifter is another one of my treasures. It was Mom’s. I rescued it from her kitchen when she passed away in 2014. You don’t have to have a fancy sifter like this. One of those mesh strainers will work just fine.

Put your mashed potatoes into a bowl, and add the 1/2 cup melted lard and one Tablespoon of sugar. Mix it in thoroughly.

Lard? As in from pigs? I’m very old fashioned and I would never use anything else. If you simply must use shortening, have at it. It will change the flavor some. Maybe that’s the way you prefer it. That’s why doing your own cooking is so fun. You can make those changes. It just has to be melted for this step.

Measure out the 1 1/2 cups flour. Sift it into a separate bowl. Don’t forget to include that bit that fell out onto the saucer. From that, measure it out again, carefully, with a light hand. Spoon it, don’t dip the measuring cup. It might not make sense, especially with the next steps, but just humor me. Sweep it off with a knife to level it out, and add it to the sifter. There will be flour left.

To the second measuring of flour add the 1/2 teaspoon baking powder and the 1 teaspoon salt. I don’t use kosher salt for this. Just plain iodized salt.

Sift this mixture, including what fell into the saucer, into the potato mixture. Gently stir it until you don’t see flour any more. Now it’s time to rest. Go sit down, have a glass of tea or wine, and let the ingredients fall in love with each other for about an hour. Cover the bowl with plastic wrap so it doesn’t dry out. If you are going to be more than an hour put it in the refrigerator.

Hey, didn’t I just put this picture on here? Yes. But now I am showing you that you must, must, MUST flour the pastry cloth. Dust the flour on with your sifter. Rub it into the cloth with your hands. Make a pile in the corner with the excess. Do have some excess. You will be using it.

I like to use a cookie scoop to portion the amount. It keeps it even. This one might measure out to a half cup. Just estimate. You need “some”. From now on, it’s a bit inexact.

I dust more flour from the sifter onto the ball of dough. Some.

Now it is kneaded. Not vigorously like you might bread, but the same concept. Fold it over onto itself. You want to be gentle, but you need a handleable dough. I think I counted ten times I folded it with extra flour. You don’t want it to be too sticky.

Your rolling pin, whether it’s the fancy ribbed kind like I have here, or with a cotton “stocking” you have to have gobs of flour on it. Then you start from the center working out, roll it our thin. Thin. Thin. Don’t press too hard.

It’s not the end of the world, WHEN you have boo boos. Just start over.

You will never make it perfectly round. If you do, you might be in the wrong business and you need to start doing this for a living. Just let it be rustic. I know, I stole that phrase..she won’t mind.

Now comes the hard part. Take your stick and slide it beneath all over. There should be no spots that are sticking to the cloth. You are going to pick up the lefse with the stick and move it to the pan. If you have done it right, it will stay in one piece.

Just like that!!!!

Roll it on the pan by turning the stick over and over. Whew! The hardest part is done! Let the drooling commence…..

Cook it until bubble start to form. When you get good at this, you can be rolling out your next piece while this cooks.

A word about lefse irons. You might be able to try this on a pancake griddle or on your stove top with a flat grill. But this lefse iron is set to 500 degrees! 500! I tried it on a cooler setting once. It doesn’t work as well. I turn the heat as high as it will go.

Turning the lefse is similar to carrying it to the grill. Go down the center, and flip it, putting half on at first, then the other half. You’ll figure it out.

The timing on the second half is dicy. You just have to guess. You can peek and see how browned it’s getting. If you cook it too long you will have burned spots and dried out edges.

Remove the cooked lefse the same way you put it on.

I like to cool it on a cookie rack. It cools quickly. It needs to be completely cooled before being stacked.

You will have a lot of loose flour on your griddle. Very carefully, with a dry paper towel, brush it off. Yes, yes, you’ll get it all over your counter. But it’s hot, and it will burn if you leave it.

 I fold the lefse pieces into quarters, then put one batch into a gallon ziplock bag. They can be kept on the counter for one day. Refrigerated for about five days, and frozen about a month. Yes, they are fragile, perishable, fussy little pieces of confection. They taste like heaven itself.

I was at a convention once where these were served. Someone asked me how to you eat them? I said butter and sugar. They took the rolled up pieces and put butter on the outside. No no no you unroll them, and butter them. Salted, softened butter. Tub margarine is for lazy people and I suppose you could use it if I’m not looking. Sprinkle sugar over it. and roll it up.

My beloved husband took pulled pork and put that on his. Someone else I knew used mashed potatoes as a filling. Sacrilege! My grandmother is looking down from heaven saying “Nay, nay, nay, nay.” Another friend likes melted butter with brown sugar. Now I could totally try that and I know I would love it.

I know this post was lengthy, but I gave you the best directions that I possibly could. The only way to get it right is practice.

I did try this once with gluten free flour. It is very difficult. The dough has to chill completely before rolling out. Use new pastry cloths and rolling pin covers so you don’t get cross contamination. It doesn’t keep together very well, so small, small pieces. In fact, if I try it again, I may try it on a tortilla press, with plastic above and below, rather than rolling it out. Chilled, chilled chilled is the deal!

Good luck!

Party Like It’s 1954–

1954 cookbook cover picture 6

This picture off the cover of that 1954 cookbook just cracks me up! The drink recipes in this book feature a blender–which in those days was rather rare for an average housewife to own. But here, you have a man dressed in a white shirt, vest, jacket, and black bow tie, the large black glasses of the day,  and a teeny tiny little martini glass. But what really gets me about this picture is the begging puppy dog. Oh, just give him a little sip already! The bucket of ice on the bottom shelf that is within nosing distance of the dog too, makes me very glad this is only a drawing. Still, I only thought it right and fittin’ that I should test a drink recipe out of this book. Just doing my job you know.

I had given up alcohol for a few months while doing a cleanse, and boy was I ready for a treat. It had been a rough day, and it was a perfect day to test this recipe! IMGP1151

I know, this picture is listing a bit–I promise this was my first and only one that night! Of course it went right to my head, (hic) and I giggled to myself for at least an hour. It was a lovely treat.

Pink Lady

2 jiggers Dry gin

3 teaspoons grenadine

1 teaspoon heavy cream

1 egg white

4 ice cubes

Blend for 10 seconds, strain and serve in cocktail or 4 oz. glasses

I did the 10 second blend and realized I had forgotten the egg white so I dumped it back in and gave it another 10 seconds. I am pretty sure I didn’t strain it either. That would be to remove any unruly ice-cube chunks. I kind of liked them anyway.

For the faint of heart about that raw egg white–don’t use this for the very young or very old or compromised immune systems. Perhaps the alcohol will kill any badness anyway and the folks mentioned above shouldn’t drink to begin with. If you are hosting and want to take no chances, pasteurized eggs will do the trick. If you can find them. My lovely local grocery store used to carry them and quit. No one takes chances with raw eggs anymore. Pity. That lovely foam across the top of the glass is from the egg.

I thought it was fine with gin, but I would love to try it sometime with my friend, Grey Goose.

The last recipe I tested out of this book was something I thought looked simple and any newlywed of 1954 (like my mother) could do. It was called,

Quick Italian Tomato Sauce

“Here is an American version of the long-cooking tomato sauce for spaghetti. An ideal quick dish for the homemaker in a hurry”

quick italian

This dish still takes nearly an hour to assemble and simmer. Our modern-day “in a hurry” generation would think this takes too long.

Heat in a large skillet….

2 tablespoons olive oil

Add and cook until lightly browned…

1 medium size onion cut in quarters

1 clove garlic, minced

IMGP1119

I had never cooked an onion this way before. But this recipe was another featuring the blender so I did as I was told. It spattered terribly over my medium heat stove. It might have worked better over low heat.

Remove onion from skillet and set aside.

IMGP1122

Add to skillet and cook over medium heat until browned, breaking into small pieces with fork or spoon…..

1 lb ground beef

Meanwhile, put into blender container….

1  1/4 cups (10 1/2-11 oz. can) condensed tomato soup

1  1/2 cups (two 6-oz cans) tomato paste

1/2 cup coffee beverage

1  4-oz can mushrooms, drained

1 teaspoon salt

1/4 teaspoon oregano

1/8 teaspoon pepper

Add onion to blender container; cover and blend until mushrooms and onion are finely chopped.

Stir blended tomato mixture slowly into browned meat. Simmer uncovered over very low heat, stirring occasionally, about 35 to 40 min., or until thickened.

IMGP1130

If sauce becomes too thick, blend in…

1/2 cup water

Serve over cooked spaghetti.

Sprinkle with…

Grated Parmesan or Romano cheese.

4 to 6 servings.

I will have to say, Martin and I found this really bland. We each took a taste out of the pan, made a face, and adjusted seasonings. With the addition of garlic powder and a lot more pepper, and a teensy bit more kosher salt, it tasted a lot like the stuff my mom used to make. I was intrigued by the addition of the coffee, and may use that again in my tomato sauce recipes. My brother was a dinner guest that night, and that canned tomato soup lover gave it a hearty thumbs up. He is a very polite man.

My personal twist on this recipe was serving it over zucchini “noodles” instead of pasta. It was delicious, and I saved my calories for another glass of wine.

IMGP1131

1954 cookbook cover 001

This is the back cover of the cookbook. My favorite parts are the chocolate spatters on the chef’s coat, and the teenager’s clothes. We all know mom’s dressed like that in those days too! So idyllic. I wish I had a time machine………

Party Like It’s 1954 continued: Potatoes Rolled In….Potatoes?

When I was growing up, every time we sat down to a nice meal it always included potatoes of some sort. Baked, fried, boiled, mashed, scalloped, for heaven’s sake a meal wasn’t a meal without potatoes. Once I left home and got married, I varied things a little and Martin and I expanded that to include hash browns, roasted potatoes, and once in a while, rice. Martin commented to me when we were newlyweds, “You always have to have something brown, something green and something white for supper.” As the daughter of a midwestern farmer that is the normal thing to do.

Throughout our married years, heaven forbid if I run out of potatoes. Martin is a tolerant husband–a visiting kitty has left drifts of cat hair for instance and he just shrugs–but if we run out of potatoes he becomes really angry. He says unkind things like, “How can you let something like this happen?”

Familiar sight in our house! It used to be a gigantic kettle when our kids were home.

Familiar sight in our house! It used to be a gigantic kettle when our kids were home.

This next recipe was very well received, of course. In our old age and fatness we try to cut down on potato consumption, so this was a real treat. This is from the 1954 cookbook, The Mixer, Hand Mixer and Blender Cookbook.

1954 cookbook cover


This recipe just looked too fun to resist. This was in the “Hand Mixer” section, so I got my mise en place ready to go, with my trusty hand mixer that I got for a wedding present in 1979!

IMGP1106

Whipped Potato Pats

Base recipe

Grease a large, shallow, baking pan.

For Whipped Potatoes–Wash, pare and cook covered in boiling salted water to cover….

4 medium-size (about 1 1/3 lbs.) potatoes, cut in halves

Cook about 20 minutes, or until potatoes are tender when pierced with a fork. Drain.

To dry potatoes, shake pan over low heat. To heat mixing bowl and beaters, scald them with boiling water.

I may or may not have skipped this part. I had never heard of doing that before. 

Mash potatoes thoroughly on low speed. Increase to high speed and whip in until potatoes are fluffy…

3 to 4 Tablespoons butter or margarine

1/3 to 1/2 cup hot milk or cream (adding gradually)

and a mixture of……

3/4 teaspoon salt

1/4 teaspoon monosodium glutamate (of course I used it–I have Accent in my spice cabinet. I didn’t get a headache or die or anything.)

1/4 teaspoon paprika

1/4 teaspoon pepper

Whip into potatoes….

1 egg beaten

1/4 cup (1 oz) grated Cheddar cheese

Whip on high speed until potatoes are light and fluffy.

Now you and I both know if we over whip potatoes they become the consistency of ga-luuuue! I love my gentle potato masher and seldom use the mixer any more for mashed potatoes, but hey, I was trying to stay retro here! I just urge caution with this step.

For Potato Pats—-Shape mixture into balls, patties or pyramids.

I have a confession with this step. It was a mess. My first mistake was adding too much milk–I went with the entire half cup. The next time I try this recipe, and I will, I will use less liquid, and red potatoes, instead of the russets I used. I think they will hold together better. Another alternative is chilling the mashed potatoes before the next step. I suspect many a thrifty housewife in the fifties used the next steps to disguise leftover mashers—

Brush with….

3 to 4 Tablespoons softened butter or margarine

Almost impossible to do with my gooey mess, but hey! I can’t let a calorie get away!

Carefully roll in……

1/2 to 3/4 cup finely crushed potato chips.

IMGP1108

I used plain, straight up, Lays Classic Potato Chips. Thrifty housewives would use the crumbles in the bottom of the bag, but after eating a few I just smashed these with the bottom of a glass.  I lived on these things growing up. Mom usually bought a generic store version. I dipped them in ketchup–never heard of sour cream in those days. Nom-nom-nom-nom—

Place in baking pan. Make a tiny hollow in top of each pattie and dot with…

Butter or margarine

Bake at 400 degrees 15 to 20 min., or until heated thoroughly and browned. 6 servings.

IMGP1111

This is before going into the oven. I know, I know, they look really—rustic. I pictured even sizes and shapes. I even used my ice cream scoop to try to get them even. Those little ones might have been the experiment with the smaller scoop. My camera decided it didn’t like my after baking picture and declared it an “invalid file”. I will tell you, despite their rugged appearance, they looked amazing!  I had felt like a frustrated newlywed trying to get them into nice shapes, but hey, the results were worth it. They tasted really good! I would serve this to company, or even a holiday that didn’t require gravy. I may try different flavors of chips–wouldn’t this stuff rolled in Doritos be just amazing?

Party Like It’s 1954

While desperately digging for my mother’s fudge recipe, I stumbled across this old 1954 cookbook, called, The Mixer, Hand Mixer and Blender Cookbook.

1954 cookbook cover

My mom recently passed away, and 1954 was the year she and my dad were married. I wanted to immerse myself into the culture of the day. Plus this cake picture made me want to want to go back to that time.

perfect cake


Oh, this picture was on the inside cover and I wanted to make that cake! I wanted to serve it to nicely dressed ladies in my “front room” for afternoon coffee. I wanted my husband to be like this:

1954 cookbook cover.picture 6That dress! That apron! The adoration of a husband!

I did not make the cake. I might someday, but a recent thirty pound weight loss held me back. For now. I predict a cake like this in my future.

I don’t know the origination of this cookbook. Could have been Mom, or an aunt, or either grandma, or even a garage sale find. I will tell you this.

The pages are pristine.

No grease spots or chocolate stains. It was stuffed with clipped recipes. They were pretty clean too, although I am certain the fudge recipe Mom used was one of the recipes. Not her copy, but then there were several copies of it in there.

I studied the recipes to see if I could get a clue why no one used this cookbook. The book featured recipes using those newfangled appliances. Stand mixers, blenders, even food processors. Those were for rich people. Mom was a farm wife who didn’t even have running water. The recipes were far too fancy for a South Dakota meat and potatoes family of the mid-fifties.

1954 cookbook cover picture 5This was not my mama. No, she would rather be out in the barn to help farrow pigs then in the kitchen, as a young newlywed. She did master complicated confections later on, but in 1954? Not my mama. She would have said, this stuff is for rich people.

I do remember her owning a mixer. When Dad sold the farm and moved into town, there was a little money left over for a few new things. I remember new living room furniture and bedding. My best guess is, a nice new mixer was a purchase at that time.

sunbeam mixerIt looked exactly like this. You could detach the mixer from the stand and it would be a hand mixer. I remember a lot of chocolate splashed onto that mixer. I still have the bowls. Or at least the little white one. They are in my Goodwill pile next to my front door. Makes me a little sad.

But fast forward sixty years and no one uses mixers like this any more. Every bride covets THIS:sparkley mixer

Oh yeah, that’s what I’m talking about. And yes, that is my mixer.

I tested a few recipes out of this cookbook. I tried to do everything exactly, and I mean exactly like the book said, except I used my new modern stuff. Have to draw the line somewhere. Remember, these recipes were to teach housewives how to use the mixers. Oh, and the book doesn’t appear to be brand specific. That surprised me a little bit.

The first recipe I wanted to try was Cheese Blintzes. I was watching a Hallmark movie with my husband recently, and a lady was trying to sell her baked goods to a little cafe. The manager said, “Do you make blintzes?” (He was being sarcastic.) She said, “I do now!” Proudly I told Martin, “I know what blintzes are, even!” I thought I did. They were nothing like I expected. But they were really fun to make.

Cheese Blintzes

For filling–Combing in small mixer bowl and blend thoroughly on medium-low (4) speed…

1 1/2 cups (12 ox.) cream style cottage cheese

1/2 cup thick sour cream

1 1/2 tablespoons sugar

1/2 teaspoon salt

Set aside.

I used my food processor not my mixer. I couldn’t find any cream style cottage cheese. Do they even make that?

IMGP1083

For this recipe, I thought the lumps, or “curds” of the cottage cheese would be undesirable. Besides, the recipe called for “cream style”.  So my magic food processor did the job!

IMGP1087

I am certain today’s recipes would call for cream cheese. But I stayed true to the book!

For Pancakes–Sift together into a bowl…

1 1/2 cups sifted flour

1/2 teaspoon salt

Blend in gradually to form a smooth paste…

1 cup cold water

Set aside.

IMGP1070

A word or two about sifters. This is my mother’s sifter. It is strong, sturdy, and perfect. I rescued it from her kitchen, while most everything else went for this summer’s rummage. (More on my hoarding at a later time. Hahaha)

I had often thought that the purpose of sifting flour was to get out those little brown bugs that used to show up in them. (Yes I know–gross.) (And I haven’t seen a little brown bug in over twenty years. That makes me nervous to tell you the truth.) But my mom taught me the proper way to sift, and you actually end up using less flour. It makes it fluffy. Spoon your flour into a measuring cup, level it off,  and dump it into the sifter. Sift into a separate bowl. Carefully spoon the sifted flour back into the measuring cup, again level it off, and use that for your recipe. There will be flour left over. That goes back into the canister.

Good thing I remembered how Mom taught me!


It might look like wallpaper paste!

It might look like wallpaper paste!

In a large mixer bowl, using medium-high (8) speed and clean beaters, beat until thick and piled softly…

4 eggs, unbeaten

IMGP1081

I had a problem with this step. I could not get the eggs thick and piled softly. First I usedthe whisk attachment with my beater. Then I switched to the paddle attachment. (Above). Then, since I had a little leftover dusting of flour in the bowl when I started, I wondered if that was the problem, so I saved those eggs for scramblers, cleaned the bowl and beaters and started over. Still no thick and piled softly. Would room temperature eggs have worked better? Chilled beaters and bowl? Eggs from free range chickens similar to 60 years ago? No idea. I did my best with this step and moved on. 

Add gradually to eggs, beating at medium-high (8) speed…

1 Cup milk (of course I used whole milk)

Gradually pour in flour mixture, continuing to beat until smooth and well blended.

Heat 6-in skillet; it is hot enough when small beads of water dance on surface. Grease skillet lightly with…

Butter or margarine ( real butter!!!)

Love my little cast iron skillet! Do not love my flat top stove.

Love my little cast iron skillet! Do not love my flat top stove.


Pour about 1/4 cup batter (or enough to make a thin coating) into skillet; immediately tilt skillet back and forth to spread batter evenly. Cook pancake over medium heat about 2 min., or until lightly browned on one side. With spatula, remove from skillet and place on warm platter or absorbent paper, browned side up. In this way, cook all of batter; stack pancakes on top of first one. (It should not be necessary to grease skillet for each pancake.)

Thicker then crepes, thinner then pancakes.

Thicker than crepes, thinner then pancakes.

I obviously needed to adjust not only the heat, but cut the time down to less then two minutes.

I obviously needed to adjust not only the heat, but cut the time down to less than two minutes.

Much better!

Much better!

For Blintzes–Spoon about 2 tablespoons of filling mixture onto center of each pancake on browned side. (Soooo those over-browned ones won’t matter. It’s on the inside and doesn’t show! Burned would affect the flavor, however). Fold two opposite sides of pancake toward center partially covering filling. Fold the other two opposite sides toward center over filling. Press edges to seal. Repeat for each pancake. (Just like wraps or burritos. It does say to keep them on a warmed plate. They rolled easier when still warm.)

IMGP1099


IMGP1100


Heat in a large skillet…

1 Tablespoon butter or margarine

Arrange several blintzes in skillet, sealed sides down. Brown on all sides over medium heat, turning carefully with fork or tongs. Remove blintzes from skillet and place on serving platter.

IMGP1101

I crossed referenced this recipe several times with more modern versions. Every single one of these recommends a resting time in the refrigerator for several hours for both the batter, and the assembled blintzes. I did not, keeping with the directions of the book. They handled just fine. I do see a little oozing of the filling which may or may not happen with some chilling. 

Serve hot with currant jelly, or sour cream.

IMGP1103


Of course greedy me, I used both. 

Now not everyone has current jelly in their pantry. I did. I really don’t know why, but I was happy to have a reason to use it. It was delicious.

An alternative suggestion in the cookbook was to boil 1/2 cup raisins briefly and drain them and add them to the filling.

How did I like it? I served it as a dessert and my brother-in-law said, “Where’s the chocolate?” It does really mess with you because you expect sweet and get more savory.  You half expect whipped cream and it is really sour cream. I  loved the browning of the filled blintz. I then served it the following weekend to my husband for brunch and that was much better with a side of scrambled eggs and onions and peppers.  I can think of many ways to alter the filling and toppings-lemon zest would be amazing as would orange zest. Perhaps switch out cottage cheese for cream cheese. Add ham, or veggies. Or increase the sugar, and add cocoa powder and drizzle with chocolate syrup. Or just increase the sugar in the filling. A lot. The possibilities are endless.


Families in Crisis

Greetings!

This is the title of the post I had plans to write in February of 2013. I got the idea from the cookbook “The Church Potluck Supper Cookbook“. It has a chapter titled “Food for the Family in Crisis.”  Page 237 states, “According to Webster’s New World Dictionary, a crisis is a  decisive or crucial time, stage, or event.” We had been through a couple of those between 2012 and 2013. A favorite aunt and uncle’s house burned down. A neighbor’s mother passed away. Our children’s families were raining babies.

So fast forward two years and we have added two more babies,  three out of four of our children moved, than Martin and I sold our dwelling of twenty years and downsized to a smaller house in our hometown five hours away. We have been touched by illness and death as Martin lost an uncle, an aunt, another favorite aunt’s mother passed away, then my brother’s wife passed away from cancer, and my mother followed three short months later. It has been a wild couple of years.

Crisis doesn’t always have to be bad! New babies and new dwellings are always joyous occasions despite being really disruptive.  But I will have to say, the past two years, (three if we count the fire), have given me lots of experience in what to do for a family in crisis. Being both a giver and a receiver have been learning experiences.

Late December of 2012 our beautiful granddaughter was born. After a couple of weeks Martin and I visited, and my gift to my son and his wife and family was some pemade meals. The meals were welcomed, put in the freezer and happily consumed by them in all good time. But when we arrived, my son’s wife, (who should be called “super-woman”), was busy in her kitchen building a meal to go for a friend in need.  Her own baby was less than a month old, she had two more children under the age of three, and there she was, cooking for a friend. I was utterly humbled.

So was this really a family in need? I am thinking the need was mine. I loved being a mother and providing food has often been a way of showing my love. I made a couple of dishes that were healthy, one that was totally decadent, and one that I often fed my son when he was a child. But only one of those meals was one I was sure the whole family would love. The rest–were my choices. I made the mistake of not checking if they had freezer space, and did they even want these meals? I came charging in there, thinking I was rescuing them and they did not need rescuing. I want to stress, the food was welcomed, but needed? Not so much.

My point of this is, do some research on needs of the family before bringing food. Last year at this time, my brother Randy’s wife Dolly was going through chemotherapy. I learned that chemo patients have limited diets, mainly because of nausea. It is hard to keep things down. Dolly sometimes couldn’t even stand the smell of the food cooking. The cookbook I mentioned thought custard pudding was a good thing to bring to people who are sick. I can tell you right now, Dolly, who was a fussy eater to begin with, would have certainly turned up her nose at custard pudding!

Randy pointed out that food brought was always welcomed, for the same reason I wanted to bring food to my son’s family–it is a sign that you are loved.  But what people in crisis might crave the most is just getting back to normal. Randy mentioned just plain Campbell’s Tomato soup made with milk was all he really wanted sometimes. I felt the same way during our move when everything I owned was in a box–I too, just wanted normal life again.

But there is no “normal” during these times. It takes time to get through it, and sometimes a “new normal” is what has to develop.

So, bringing food to people is a loving thing, albeit a bit risky sometimes. Make an appointment to bring food. Ask about preferences. Know that while the recipient might yearn to visit with you, their house might be a mess and they are embarrassed.  They might be sleep deprived, or on the way to the emergency room or just coming back from the emergency room.

Other things to keep in mind is the size of the family. Don’t bring a bag full of macaroni and cheese that serves 12 to a family of two with diet restrictions. That is best saved for a house full of bottomless pit teenagers.

1-29-13 8480

If you must bring such a large amount to a smaller family, include containers for the leftovers.

Which brings me to–containers!!!! Ziplock bags that can be stored flat in the freezer are fine. (Store toppings in a separate bag). You can write the directions right on the bag. The recipient can then put it in their own casserole dish and nothing to wash and return.

Funny story–Martin’s mom was in a wheelchair since he was 13. His dad and the kids and occasional aunt were in charge of most house duties. They had a problem casserole dish that was difficult to get really clean. They would then send a casserole off to a friendly neighbor who, you guessed it–would send said dish back spotless!!!!

Some things need to be assembled like lasagna, or this tater tot hot dish. (Recipe below). It really satisfied the OCD in me to put those tater tots in neat little rows:

1-29-13 8492

This picture only shows it half done. I did indeed cover the whole thing with the tater tots!!!!

Another healthier dish that requires assembly is this “broccoli cheese hot dish“.


Please note that toppings are stored separately, to keep them from getting soggy.1-29-13 8496


These excellent aluminum pans are actually catering pans sold at Sam’s Club or Costco. They come with lids!

1-29-13 8497


You can write on the cover with sharpie marker any baking instructions. These also stack beautifully in the freezer.

One thing to keep in mind is, dishes like these require planning by the recipient.  They have to be thawed out, and baked. Some families in crisis don’t have the luxury of even knowing what the next few hours might bring. So for some people, making extra of whatever you are having and bringing a container of a single or double serving that can be just microwaved might be a better idea.

There are internet sites that you can organize meal bringing for needy families. One I know of is called “Meal Train“. This way, if you choose to bring a complete hot meal, this can be organized within a community and there are no duplications, two meals showing up at once, or thinking a meal is coming and none shows up. Check with your family in crisis first before organizing such a thing. Some just might find this too overwhelming. Others will think it is a god-send.

When my mom died in November, my own appetite took a dive. I was off in my own little world, collecting pictures, refusing most food, and not really paying attention that poor Martin was in the kitchen struggling to feed our kids who had come here to comfort me. He did a good job, but any food that was brought was certainly welcomed.

I had often thought that good starchy comfort foods, like my tater tot hot dish, was the ideal thing to bring to a family grieving a loss. But I couldn’t eat anything like that when it was my turn. A restricted diet, and no appetite contributed to that. Bars and desserts were welcomed, and consumed, but I couldn’t have any of them. When you bring food, keep the age and restrictions in mind. A vegetable dish would have been just fine, as well as a batch of bbq’s or pulled pork.

On the opposite end, I had a client last year who wanted to eat healthy, but hated vegetables. I have a nephew who won’t touch vegetables. Some people really hate onions. People like us think if we are out of onions that itself is a crisis!   Lasagna is a great dish to contribute, but people like my daughter, who has a serious sensitivity to both gluten and dairy, would just have to sadly watch others eat it. It never hurts to ask first.

Sometimes non food items are perfect. After Mom’s death, Dolly’s sisters brought a bunch of paper products, like plates, cups,and napkins as well as packaged cookies and a large container of coffee. Wow!

One of the most welcomed hot dishes brought to me was by someone who broke all the “rules” I mentioned above. My fourth child had just been born. I was physically a mess. Martin was overwhelmed with a demanding job. My mom was there to help, but she really hated to cook by then. I came home from the hospital at lunch time just starving! Martin said lunch is ready, and there was a wrinkled hot dog on a plate in the microwave. I weakly asked for more than that, but the only other thing was chips. Yes, I know, poor planning on my part, but this had been a difficult pregnancy. Someone showed up at my door with some sort of rice hot dish, hot and ready to eat on the spot. It was in a pretty casserole dish that had to be returned. I still fantasize about just how good that tasted. You just never know when you are acting the part of guardian angel. I may tell you to do your homework, but my best advice to you is, follow your heart.


My brother Randy contributed many of the suggestions I have included in this post. I invite you to check out Randy’s blog “Splitting Time.”  It is a beautifully written tale of the journey Dolly took on her way to heaven, and the heartbreak of a new widower. The link will take you to the announcement of her death, but please read the befores and afters. Have the tissues handy.


Tater Tot Hot Dish

1 pound ground meat, browned

1 package each frozen corn and peas

2 cans cream of mushroom soup (of course I used home-made)

1 package of noodles, cooked six minutes

1 bag frozen tater tots

I put the whole works including the meat, but not including the soup into a colander and rinsed it with cold water. Into a mixing bowl it goes with the soups.  Season with pepper and a little salt but careful with that if you use canned soups. If you do not rinse the meat you can season that as it is cooking. I sometimes add onion to the meat for extra depth of flavor.

Assemble into a casserole. Cook at 375 degrees about one hour or until it is bubbly and tater tots browned.

There are many ways to tweak this recipe. Let your imagination loose!


The New Year’s Diet Bandwagon, continued

You can’t open up a magazine or newspaper this time of the year without a barrage of diet tips, workout tips, healthy eating tips and tips on how to dress to look thinner if you say to heck with all of it.

That last tip would be for me. Yes, I am a lot overweight, and no, not quite at peace with it, but hey, there’s always tomorrow.

I have dieted a lot in my life, and usually with a lot of success.

70’s: My diet was spelled with a “y” and it is what I did with my hair. (Nice and Easy, bright blond, $3.98)

80’s: Child bearing years. I tried my first diet ever in 1984. I was a disgusting 130 pounds! (I would give my right arm for that today). I borrowed a book from my diabetic aunt and learned that I should drink skim milk. I was also puzzled that on all the food lists, with how much to eat of each food, nowhere could I find potato chips on any list. (Sadly this is 100% true.)

90’s: Dieting success–mostly by eating with a measuring cup. Not so I wouldn’t eat too much, but so I would eat enough. Lots of vegetables. Crazy amount of exercise with four kids and physical jobs that took me outdoors. I looked and felt fabulous.

2000’s: Two surgeries to remove ovaries and thyroid was a game changer. Semi-retirement and “denting the chair” was a huge impact as well. Becoming a Grandma in 2009 gave me an “excuse” to look like one. And, I love food. All food.

Loving all food is actually an important tool. I am remembering my beloved late brother-in-law who was dangerously overweight. He was a fussy eater. You cannot live on cheeseburgers alone. Sadly, he is proof. We lost him five years ago. If you love all food, cheeseburgers can be a fun treat, but broccoli can be just as good.

It can! And you can eat a crazy volume of veggies and still lose weight. I remember one time of dieting that I would measure out my portions and tell my kids, wow, look at all this food I get to eat! Sometimes I had to struggle to finish it all. And when we had company once, my nine-year old told our guest, “You should see how much my mom eats!” I based my dieting on the diabetic “exchange”, and it worked for me. No fad diets for me at that time of my life!

How many “named” diets are out there now? I’ll start with the ones I’ve actually tried in the past three years: Weight Watchers, HCG Diet, Seventeen Day Diet, The Perfect 10 Diet, and an eating plan for Adrenal Fatigue.

Other named diets out there: South Beach, Curves, Atkins diet, Jenny Craig, Nutrisystem, and one I only just heard of, The Eight Hour Diet.

It is enough to make your head spin.

Do they work? Of course! But I’ve not been able to stick with any one of them.

Martin’s diet plan is a simple one. Two words: “It’s math.” (I hate math.) You eat fewer calories then you burn and you will lose weight. But losing weight can feel so uncomfortable!  All these diet plans are just trying to teach you how to get past the discomfort. You can’t just stop eating, or limit yourself to just one piece of pizza. By three p.m. you are eating the contents of the refrigerator–even that mystery container in the back that is suspect. Good nutrition is so important!

So many diets are confusing. Eat lots of this but not that. Only eat at this time. Don’t eat that at this time only before this time. And when you dream about food at night, those calories count. So does watching the Food Network.

Gahhh!

Do I have a solution? Don’t I wish! If I did, I would be back to 110 pounds and a gazillionare to boot. My only advice is to be sensible, and stay away from the fad diets, and if you have to pay money for a diet run away fast.

All diets do appear to have one thing in common. Vegetables are good. You can eat all the vegetables you want. You have to have a protein source, but which one is a hotly debated topic. But you must have protein. Find what works for you. Some do fine with dairy, some with legumes, and some with tasty animals. My personal preference is rare prime rib, but that’s just me.

If I could give only one bit of advice about diets, it would be this–stay away from processed food. If you must buy in a can or box, read the ingredient list and there should be as few ingredients as possible. Try to get as close to the food’s natural state as possible. And yes, eat less bread and pastas. Butter instead of margarine, cream instead of coffee-mate, more green tea and less lattes, and if you must have salt and sugar, add it yourself and control the quantities. And for heaven’s sake, avoid processed food that say “diet” or “reduced fat” or anything like that. A processed food is still a processed food.

Not a diet food

Not a diet food

Any idiot knows to avoid candy, desserts, chips, anything deep fried, and foofie martinis, so I won’t bring it up. Also, exercise and plenty of water is essential. This is a food blog, so you are on your own for exercise, but exercise you must.

Even natural foods have some baddies out there. Get a big potato and load it up with natural butter and natural sour cream, and they make friends with each other and have a party on your waistline and won’t leave.  Starches and fats love each other so limiting those is best. You have to have some, but just because your loaded baked potato is “real” food doesn’t mean you get to load up on it.

When you have reached your weight goal, I found the 80/20 rule works great for maintenance. Eighty percent healthy food and twenty percent treats, along with continued exercise and you can get by with a lot. Cut back the exercise though, and that changes.

I can cook healthy foods for you and give plenty of good ideas. But I am not the food police. If you eat stir fry for dinner and two hours later make a peanut butter sandwich, well, then that blows that day. Eating healthy is just like anything–stick with it and you will be rewarded.

Speaking of stir fry, I can show you how to make a delicious healthy stir fry that you can eat until you explode.

Collect and prep the vegetables you want to use.  I used carrots, broccoli, cauliflower, celery, onions, peppers, mushrooms zucchini and green beans. The vegetables that take a longer cooking time can be blanched first. You blanch a vegetable by dunking it in salted boiling water for a couple of minutes, then shock it by putting it in ice water. Drain well. The vegetables that would benefit from that include, carrots, broccoli, cauliflower, and green beans. This will make the rest of the steps really easy.

Take your choice of protein, (lean pork, chicken or beef, or even tofu) and make a marinade. This one is our favorite. I am estimating amounts, because again, I don’t measure. This is my own recipe, by the way.

1/2 cup ketchup

1/2 cup soy sauce

1 heaping tablespoon horseradish–get the purest you can

2-4 cloves crushed minced garlic. (Fresh–not the stuff in the jar please)

few drops tabasco, optional

Increase portions if you have a lot of meat. You can use chicken breast, or steak or pork chops. Cut them into strips or cubes. Dunk these into the prepared marinade and let them get to know each other while you prep the veggies.

IMGP8456

My favorite way to crush garlic is to peel the cloves, then mush it with a custard cup. Just put the bottom of the cup over the clove and smack it with the heel of your hand. Then mince with your knife as usual.

Cut up your meat and add it to the mixed marinade. I used lean pork cutlets this time.

Stir the meat well.

Have everything possible ready before you turn on your heat. Once you start this process, you can’t go back and say, hey I wanted green onions too! (which would be awesome), and then cut them up while the other stuff is cooking. No, no, no!

This is called “mise en place“, by the way–a fancy French term for don’t be stupid; get everything ready ahead of time.

This is my well used wok. Isn’t it gnarly looking? The proper term is, “well seasoned.” Oh it was new and shiny once, but when you wash it, only use hot water and a scrubber and dry it well immediately with paper towels. This lovely, dark, well used color is very desirable!  If you don’t have such a pan, a large fry pan works just fine. Don’t use non stick, because you are cooking with very high heat and non stick pans are unhealthy for such things. Cast iron would be great if you have it.

Put the heat on high and leave it there. When things are hot, hot, hot, add a good drizzle of peanut oil. Don’t even think of olive oil for this–it gets funky at high heat. Canola oil is fine, but peanut oil can take high heat and supposedly won’t stink up your house as bad.

Add your blanched veggies first, making sure there is no water left clinging to them. It might spatter otherwise. Cook until tender and a little browned. Stir constantly, pausing long enough to add kosher salt and freshly ground pepper to taste. Don’t over do it–the soy sauce in the marinade is plenty salty.

Take the veggies out before you think they are “done” and set aside. You can cover your bowl with the cover for your wok, or leave them uncovered. If you cover them, they will continue to steam. Just don’t  over cook them or you will have a soggy mess.

Next is the quick cooking veggies like the onions and peppers. Again, leave these tender crisp. My onions always seem to turn out a little soggy–I just need to practice to get them perfect. Experience will help.

Take this batch of veggies out and set aside. Let the pan come back up to smokin’ hot. Add more oil if necessary. Then add the meat and all the marinade and cook until the meat is no longer pink. If you are using beef, you can cook it to your desired level of doneness.

IMGP8472

When your meat is done, combine everything and reheat, still over high heat. I did not blanche my veggies in this batch, so my green beans were a little crunchy, but with vegetables, “done” is pretty subjective. With experience you can do this perfectly.

If I were cooking this for you, I would prep and blanche your veggies, and cut and marinate your meat, and you would cook it. It would require some level of skill, but most of your work would be done ahead.

You can serve this over rice, if you wish, but if you are watching calories, it is a fine meal alone with no rice or bread. Eat this until your are stuffed. Just don’t go overboard on the meat.

I’m going to close with my favorite quote on dieting from Dolly Parton.

“Eat whatever you want, but just don’t eat it ALL, you ole’ hog!”

Happy eating!

The New Years Diet Bandwagon

Happy new year! I have not had posts for the last couple of weeks because as Bob Cratchit said in “A Christmas Carol”; “We were making rather merry”.

Oh I cooked. And ate. And ate. And ate. The cookie supply would have been sadly lacking had it not been for my daughter-in-law Rachel. But the Christmas candy stockings. . . .I couldn’t leave them alone.

Christmas Eve was a gala affair with standing rib roast, and twice baked potatoes, home-made egg nog, and–and–I’m having trouble remembering what the vegetable was that we had. (Did we even have a vegetable?) Our dessert was Winter spiced molten chocolate cake.

Delicious but rrrrrich! None of us could finish it. We all wished we could though.

Christmas morning I got up at 4:30 a.m. to make home-made Cinnabons. I went back to bed and got up at 7:00 to punch down the dough, then got back up at 8:00 to shape the rolls. We ate them at 10:30. Cream cheese frosting and all.

I may have eaten three of them. Not all at once though!

(I will share the recipe and method for these at a later date. I was too sleepy to take pictures!)

My theory about the pounds we pack on at Christmas is this: We start really, around Thanksgiving, or even Halloween. The days are getting shorter and it is getting colder and, well, we just get more hungry. We want carbs. We want more bread and winter squash and pumpkin anything. I wonder if it is nature’s way of padding us a little for the long winter ahead.

Christmas is our greatest excuse to eat special foods. We only get these foods at the holidays and we will start our diets at New Years.

I saw on the news yesterday, (while I was at the gym believe it or not) that the number one resolution people make for New Years is weight loss.

Admit it! You made that resolution too!!!!!!

On January second, I picked up one of my foodie magazines for December. I paged through a couple dozen recipes for rich cookies, cakes, and ornate side dishes that call for a lot of brown sugar and pecans and bourbon and. . . . .

It didn’t sound good. None of it sounded good at all. What I wanted was–vegetables. I guess I just hit the wall with the fancy food. I was ready to get back to healthy eating.

So I went shopping. The grocery store was glorious with the produce! I came home with an obnoxious amount of vegetables.

Doesn’t that snowy white cauliflower just look delicious? And I am smirking a little at the word “healthy” on the mushroom packages.

Well, it is no good to buy all those veggies without eating them. I made something called, appropriately, “Veggie Hodge-Podge.”

IMGP8446 altered

This is before cooking. I did stir up the ingredients with my hands before baking. Here is the recipe.

Veggie Hodge-Podge

1-2 Tablespoons olive oil. ( I used more than that.)

2-3 boneless, skinless chicken breasts, cooked and cubed

1-2 andouille or Kielbasa sausage links, sliced

1-2 sweet potatoes, peeled and cubed

1 bunch broccoli, cut into flowerets

1/2 head cauliflower, cut into flowerets. (My cauliflower head was huge. I used less than 1/2)

1 pound green beans, cut up

1 zucchini, sliced

1 yellow squash, sliced

1 onion, sliced

4 teaspoons garlic, minced (an average clove is 1 teaspoon.)

salt and pepper to taste

Spread oil in the bottom of a 13×9″ baking pan. (I used my roasting pan). Set aside. In a large bowl, combine remaining ingredients. Toss to mix. spreading garlic, salt and pepper throughout. (I added a little dried rosemary) Transfer to pan; cover with aluminum foil. Bake at 350 degrees for one to one and a half hours until vegetables are tender. Makes about 8 servings.

Now I can just hear some say, as they are looking over that recipe–gee that looks like a lot of work!

It took me twenty minutes to throw this together, and that included dicing raw chicken breasts and lightly sauteing them as I cut up the rest of the vegetables. No excuses.

As I loaded my plate I noticed I got a lot of chicken and sausage. Yum. I didn’t fix that. Oops.

Good crusty bread would be a good side dish with this meal, but if you are cutting calories, for heaven’s sake skip the bread. If you are really serious, skip the sausage and cut the sweet potato to only one.

If you are just hungry for vegetables this was delicious. The house smelled really garlicky for a while, but we love garlic, and by the time the hour and a half cook time was done, it had mellowed down. I could eat this all the time.

Recipe Source: Fresh From the Farmstand (Gooseberry Patch) page 119

Up next–my attitudes and advice on dieting and more vegetable recipes–I still have to cook up all that stuff I bought!

Happy eating!

Diner Foods: Bowling Alley Barbeques

My very first job was at a bowling alley in Jasper, Minnesota. I started there in August of 1973, and worked there all through my senior year in high school. It was called Jasper Lanes. It wasn’t just a bowling alley–it was the local hangout, and there was a flat top grill and deep fryer. I worked there after school and some weekends. I was waitress, cook, dishwasher, cashier, and anything else that needed doing. Once in a while, I even flipped the switches so people could bowl. It was fun.

One of the things I learned to make was barbeques. That is what we called them. Just barbeques. Loose meat sandwiches served on a bun. If we were not too busy, I would toast the bun on the flat top grill.

As years went by, I saw these sandwiches called many things. Sloppy Joes is the most common, but when we moved to Iowa I was surprised when people called them “Maid-Rites”. I still call them “barbeques.” Keepin’  it simple!

Of course I ground the meat myself, this time, trimming it well and using the grinder that attaches to my mixer. I also processed it while it was partially frozen. It went through like butter!

I used chuck roast to grind, but a leaner cut would work all right too. If you buy ground meat, for this recipe, it is fine to go very lean–almost a 93 percent would be fine. Fat does carry more flavor, but this is one of those times where you can get by with a very lean meat.

I never wrote down the recipe when I worked there–I guessed, and really, I never measure when I make these. You can adjust the amounts to your liking.

Barbeques

1-1/2 pounds ground meat

1/2 cup milk (2% if you are indulging, but skim works just fine)

1 small onion, minced fine

kosher salt and freshly ground pepper to taste

I made a very large batch here–but you get the idea. Stir everything together so it looks like this.

Cook this on medium to medium high heat stirring often, until the meat is no longer pink.

The mixture will still be soupy, but do not drain! This is where all the flavor resides! If you have very fatty meat, you can skim some of that off if you wish. The secret to all this is to keep stirring it.

Now we add some goodies for flavor. It is so simple you won’t believe it!

3/4 cup ketchup, or more if desired

2 Tablespoons brown sugar

4 teaspoons vinegar

1 Tablespoon chili powder, or Worcestershire sauce. (I prefer the chili powder, myself)

1/4 cup water or more if needed

Stir this well and simmer slowly until all the liquid has evaporated. A lower heat is fine for this–with the sugar in there you don’t want it to burn. Soon it will look like this.

Yum! But these are barbeques not chili, so this needs to reduce the liquids more. Be careful to not over season at this point. The seasonings become more concentrated as the liquid reduces.

Ah! That’s more like it! This large batch in my 12 inch cast iron frying pan took about 1/2 hour to reduce down like this. A one pound batch in a non stick skillet may take as little as five or ten minutes. This is not the time to go do something else while this is cooking. This can easily burn, and if you don’t stir it every few minutes, it will get clumpy and you won’t have this nice texture.

This is the stage at which you would adjust seasonings. I ended up adding more salt, pepper and chili powder. Then it was perfect. You may even need to add a little more vinegar or sugar, depending on your tastes. You can always add, but you can’t take away. Experience will help you here.

I like to add a little ketchup to my sandwich; Martin likes to add raw onions.

This is another excellent make ahead dish. It stores well in the refrigerator for up to five days, and in the freezer for up to three months.

Diner Food: Pulled Beef Sandwich with Blue Cheese Mousse

Now this is gourmet cooking. I was intrigued by this dish on my favorite program, Diners, Drive-ins and Dives.  I used my dvr to back up and write down method and approximate measurements for ingredients. It is delicious and well worth the effort! They were visiting the Zest Restaurant in Indianapolis.  If I ever get near there, I will certainly visit. For now, I have to content myself with duplicating this delicacy.

Oh, can I hear some of you say, “Blue cheese Mousse?? Ewwww isn’t mousse supposed to be chocolate?” Steady, now. Stay with me. This is really good.

Start out by cooking a chuck roast.

I prepared the chuck roast by taking a sharp knife and making little slits and putting garlic slivers into them. Tuck them in well! (If you do not care for garlic, perish the thought, you can skip this step.) Then take your roast and smear it with vegetable oil on both sides, and season well with kosher salt and freshly ground black pepper. Then put it into a screaming hot cast iron fry pan. Lower the heat to medium and brown the roast on both sides for five minutes.

Putting a crust on it like that adds lots of flavor! After you have browned the second side, leave it in the pan, and add enough red wine and beef broth to come up about half way or so. Red wine first, to deglaze the pan. How much red wine? I used about half a bottle. And use the good stuff too–don’t even think about using the “cooking wine” you find in grocery stores. Ewww. If you do not like to cook with alcohol, just canned beef broth is fine. Use the unsalted beef stock, not the condensed version. Swanson’s in the box is the best. Well, home-made is the best, but that’s another subject.

Have your oven preheated at 350 degrees. Cover your pan tightly and bake for three hours. If the roast starts to smell “different” toward the end, check the liquids. Add more beef broth if needed. The liquids here almost weren’t enough–but I squeaked by. And three hours is just right–more would over cook it for sure.

Remove the meat from the pan and put it on a sheet tray. Shred with two forks, or your hands if you want. (Hot!) Reserve the pan juices. Don’t skip that part. Reserve the pan juices!!!!!!!!!!

Now your roast beef is ready to eat. This is what I used to make the Hot Beef Sandwich in an earlier post. I used the pan juices to make the gravy. This time.

If you are making the blue cheese mousse sandwich, have the following steps done ahead of time. I chilled my leftover beef and assembled everything on a different day. Easy!

Blue Cheese Mousse

Into a food processor, put the following ingredients:

1/2 cup Hellman’s real mayonnaise

1/2 cup sour cream

1 shallot, finely minced

1 cup crumbled blue cheese

the juice of one lemon, with a package of plain gelatin “bloomed” into it

Generous pinch of kosher salt

Process gently in pulses until fully combined. You should still see chunks of blue cheese.

Take one cup of heavy whipping cream and whip until thick. Take blue cheese mixture out of food processor, and fold into whipping cream. Don’t even think of cheating and using Cool Whip here. It just won’t work. Real stuff is best! Chill this for a couple of hours to allow to set up.

Next, make some “onion jam”. It’s also really easy!

I melted some unsalted butter and grape seed oil into a fry pan. Then I added two onions, sliced not too thin. Kosher salt and freshly ground black pepper can be added at this time.

Oh, while these are cooking anyone in the house is going to come and see what is going on–it smells so good! But when they look like this, they are not done yet! Patience! Make sure your heat is not too high that they burn, and stir often. Wait—-wait—this takes probably a half hour or so.

You can cook it farther down then this even, but by now, I was seriously salivating and didn’t want to wait any more. I removed the onions, and didn’t want to waste all the goodness left, so I added a little red wine to the pan, scraped up all that goodness, and cooked the red wine until it reduced to about half.

Take a hunk of french bread and cut some out of the middle, as pictured here. Take the piece that you removed, and save it for another use. (Turn it into bread crumbs, or eat it for breakfast, or do what I did and eat it on the spot to keep up my strength.)

Assemble your sandwich while your oven is preheating to 450 degrees. First wrap the prepared bread with foil, leaving the top open but covering as much bread as possible. You don’t want the bread to over crisp or burn.

Then add the cooked beef, some of the onion jam, then either the red wine reduction or reserved beef juices. The foil will help keep it all in the sandwich.

Then take a small cookie scoop and put three scoops of the blue cheese mousse over the sandwich. Put the sandwich on a sheet tray to catch any stray juices and put into the oven. Heat until the cheese is melted and browned and bubbly.

Like what you see? This entire concoction can be made ahead. The sandwich can be assembled up to the addition of the mousse and hanging out in your fridge until you are ready. Add the mousse and heat and enjoy. If I were cooking for you, I could do this on the cooking day and you could enjoy it some evening that week. Check out my “about” page on the very top of the blog to get the details.

Next: Bowling Alley Barbeques

Diner Food: The Double Cheeseburger

This is the second day I am featuring Anderson Cafe in Sioux Falls, South Dakota. Here is an ad I found for them and its source.

This must have been the ad from the newspaper. I do wish I could have known what year this was. I really have no idea!

Today I am featuring a double cheeseburger. Anderson Cafe called it the “Big Buck”. Buck (not Anderson by the way) was the nick name of the owner of the cafe. The burger suspiciously looked very much like the new-fangled “Big Mac” that you-know-where was debuting. The burger at the cafe, however was much more substantial.

What is my twist on the “big buck?” Freshly ground meat, of course. I based my method on Alton Brown’s Good Eats. His episode “Burger of the Gods” tells of a simple method to grind your own hamburger using a food processor, then cooking it. I followed his method almost exactly. My mistake? Using all chuck instead of half chuck and half sirloin. I should have trimmed the meat more too. The flavor was to die for, but it was a little chewy. Sirloin and better trimming would have taken care of that.

Cut the chunks about an inch or so big, and trim off more of the fat then you see here.

After ten one second pulses, (say “one thousand”), the grind should look like this. You do not want to turn it into pate.

I then weighed each portion into six-ounce portions. (Alton says to use five.) I put them into my new handy-dandy patty former. Sweet!

On to a flat-topped griddle, to keep things authentic, and a sprinkle of kosher salt and nothing else! Not even pepper!

Four minutes per side, and don’t guess-use a timer, for medium rare. Yes, you can do medium rare when you grind your own! Add a minute or so if you want it medium. And like Alton says, if you want it well done–just don’t bother.

I cut a Kraft Singles cheese in half diagonally to make a triangle and divided it between the pattys. This is in keeping with the Anderson Cafe style. I remember a funny story when the cook wanted to use a better type of cheddar instead of the American cheese that melts so well. Cheddar isn’t as “pretty” when it melts. The waitress brought back a cheeseburger and told the cook, “My customer say this cheese is older than you are!” (She may have been in her forties or fifties.) Well the cheese wasn’t old, but she went back to using the processed cheese. I, who prefer pure and real ingredients, might use a different cheese for as many things as I can, but sometime you gotta stick with the classics.

I toasted a sesame seed bun, then made a home-made (sort of) sauce with mayonnaise, ketchup, and pickle relish. I was very generous with it, and it was delicious! I used a “skinny” bun to put between the pattys. I am ashamed to say, I ate that whole thing. It was so good!

I want to remind you again, that if you live in North East Iowa in the Waterloo-Cedar Falls area, I can come to your house and be your personal chef. I will prepare five meals with up to two sides per meal and store them in your refrigerator or freezer for you to finish when you are ready to eat them. Visit my about page for prices and more information. This would make a great Christmas gift!

Up next: Blue Cheese mousse over roast beef sandwich! Intrigued? You should be!